.png)
Frequently asked questions
A question on your mind? Let’s find your answer.
Open a question below and follow the steps one at a time.
I don’t have Wi-Fi. What should I do?
Don’t worry. You can use a temporary hotspot to repair geteduroam. Ask a classmate or teacher to help if needed.
- Step 1
Connect to a hotspot temporarily
Ask someone with working Wi-Fi to turn on a mobile hotspot on their laptop. On that laptop, open Settings → Network & internet → Mobile hotspot. Then connect your laptop using the hotspot name and password.
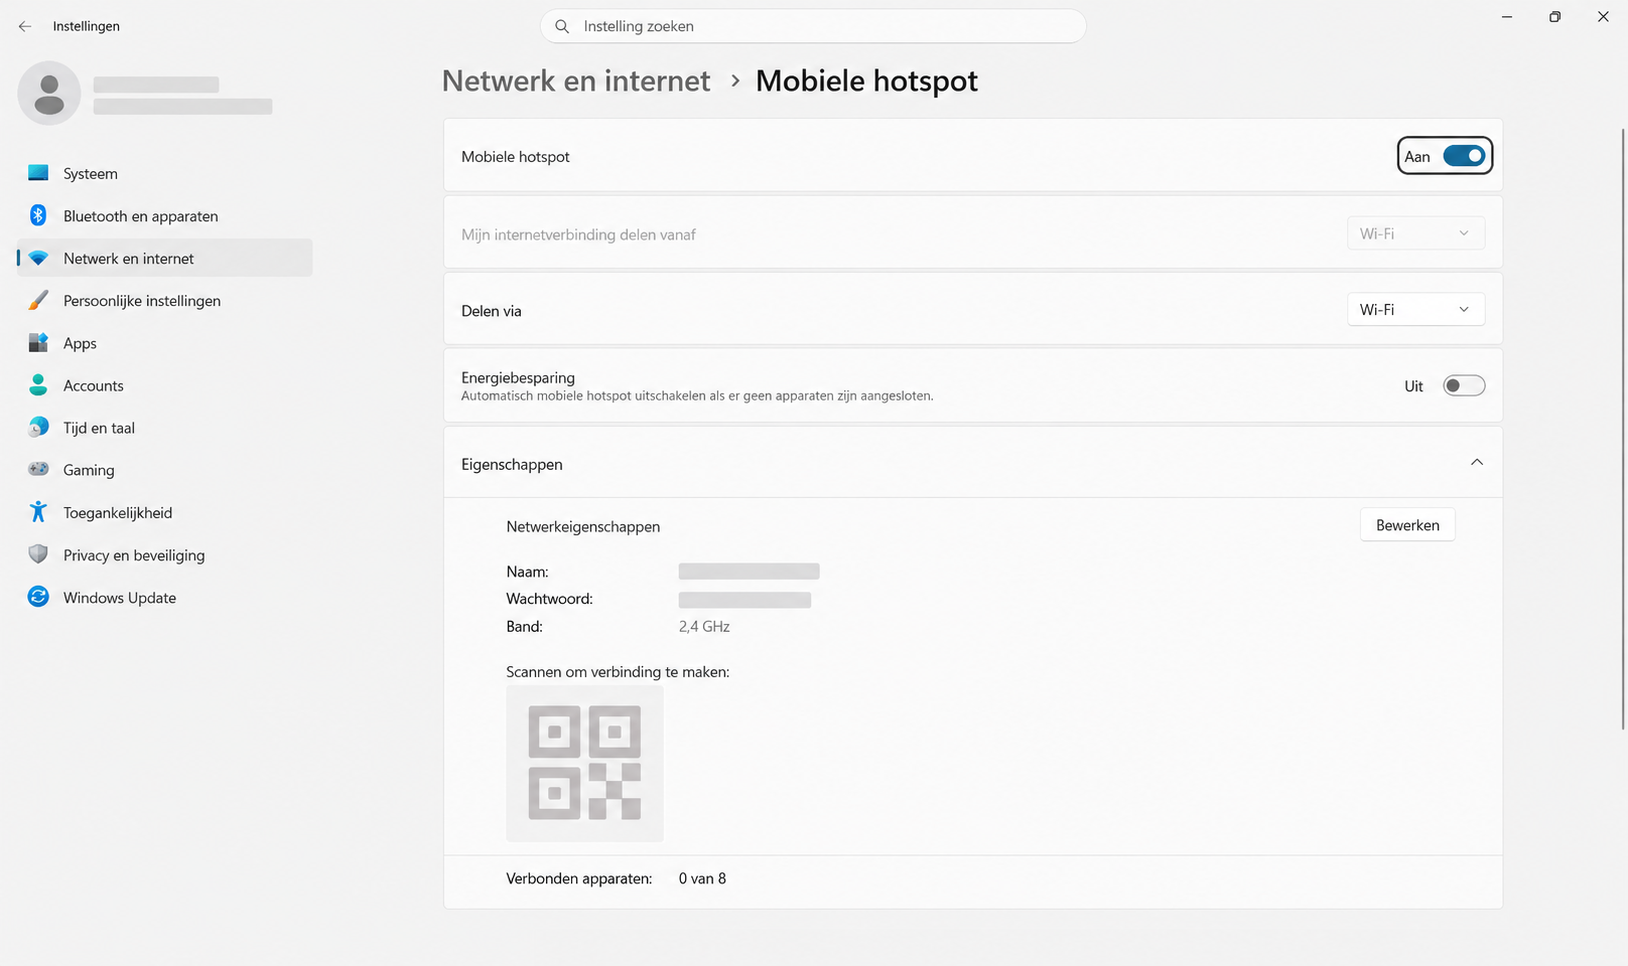
The Mobile hotspot switch should be set to On. - Step 2
Open geteduroam
Press the Windows key, type geteduroam, and select the app with the blue Wi-Fi icon.
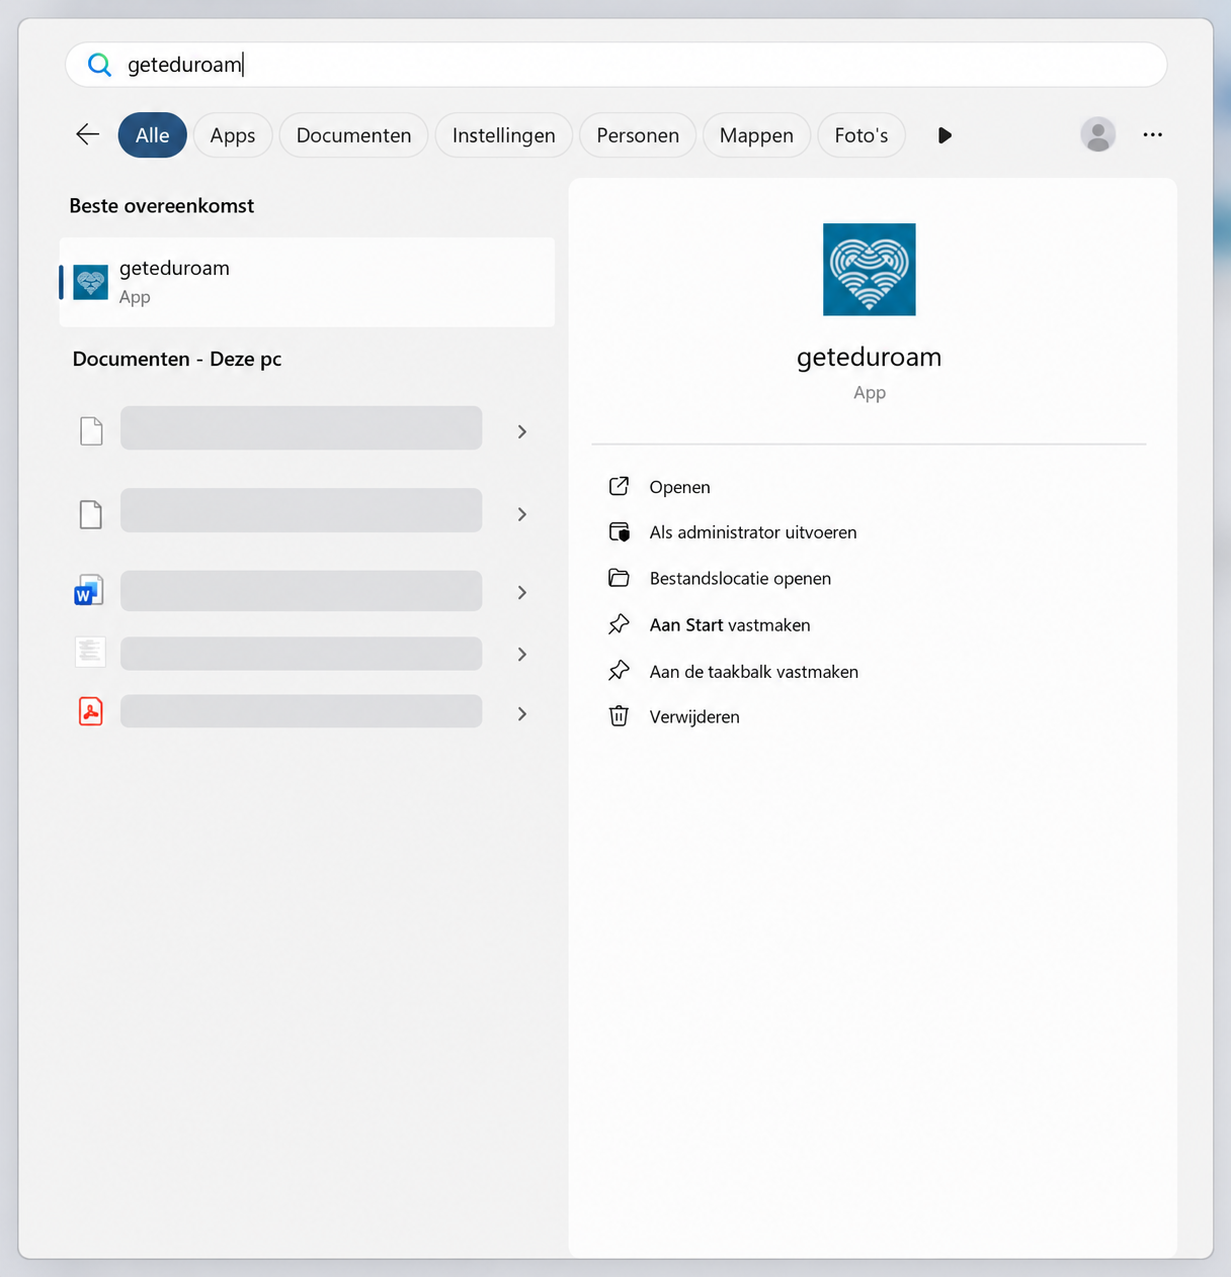
Search for geteduroam and open the app. - Step 3
Select the bottom button
In geteduroam, select Repair your account. It is the bottom button. On your laptop, this button will probably be red.
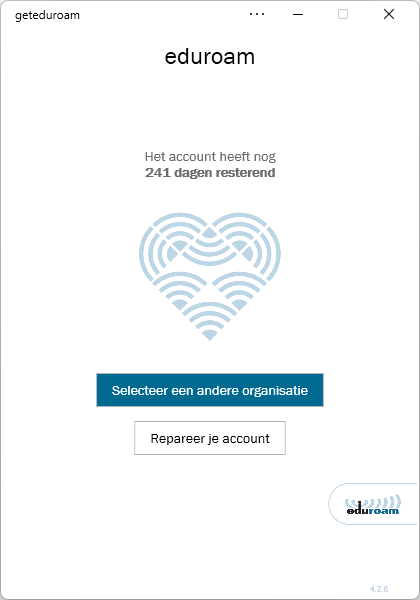
Select Repair your account. - Step 4
Sign in and approve
A web page opens. Sign in with your school account if asked. Then select the blue Approve button.
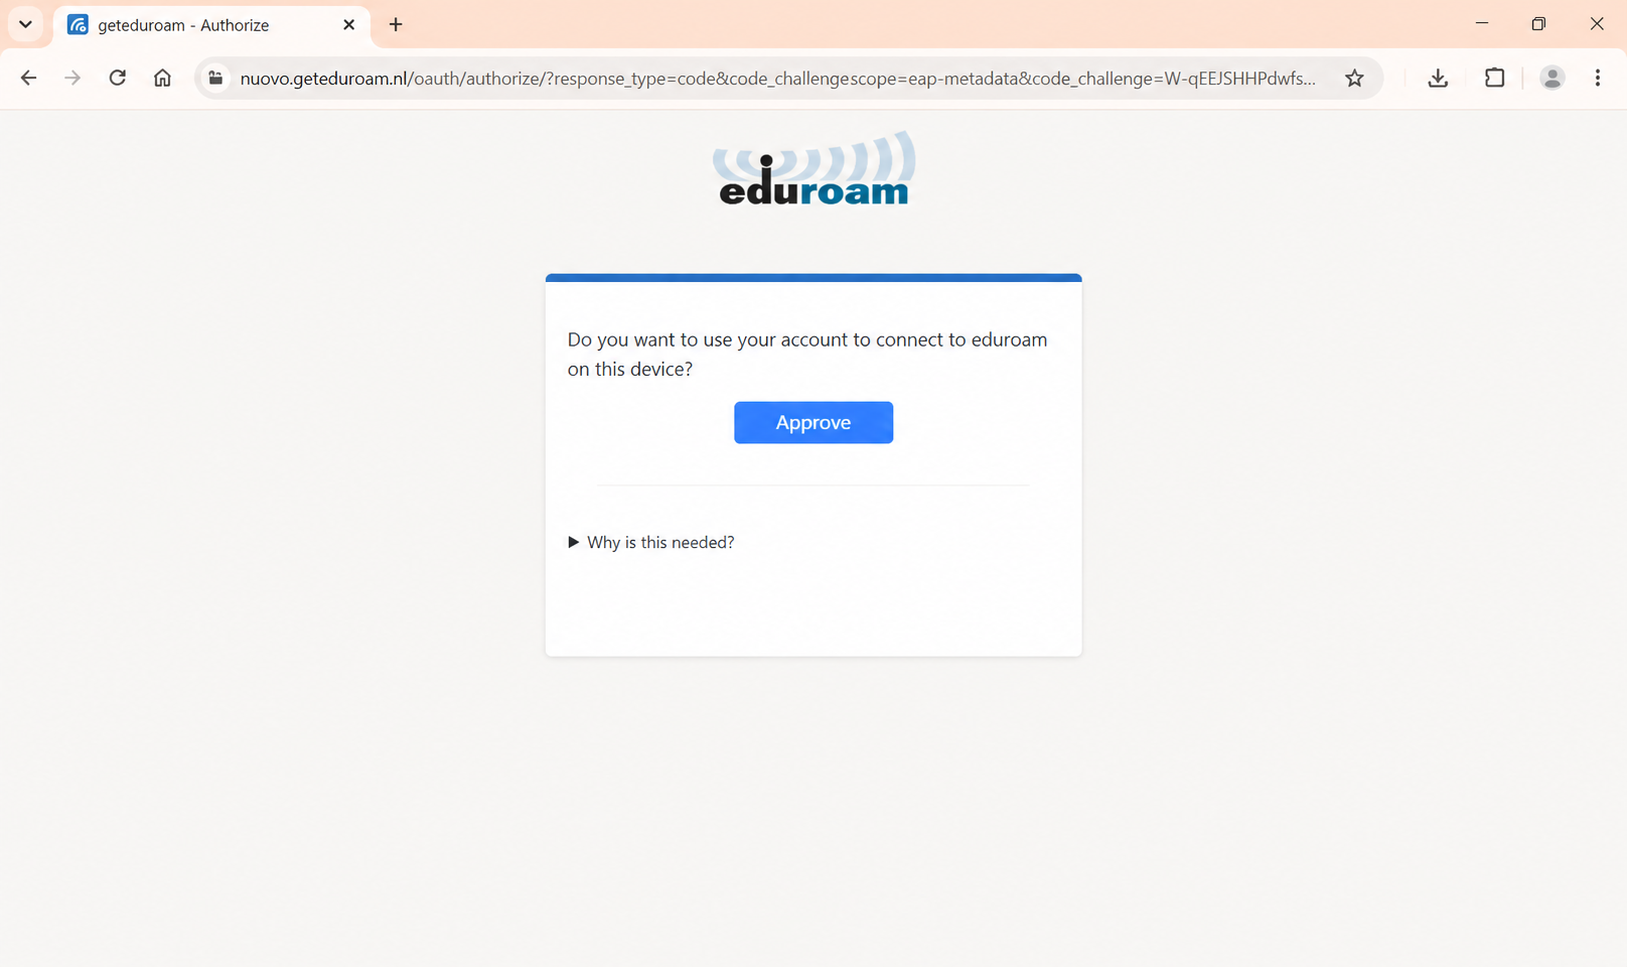
Select the blue Approve button.
Done! Wait for geteduroam to finish. The app will then connect to eduroam automatically. You can turn off the temporary hotspot afterwards.
How do I print at school?
Need a printout? Upload your file to the print website and collect it from a Canon printer. Use a PIN to sign in on the printer. You do not need a school card.
- Step 1
Open the print website
Go to nuovo.mycampusprint.nl. Select Log in met je NUOVO account and sign in with your school account.

Sign in with your school account. - Step 2
Upload your file
Drag the file you want to print into the upload area, or select it using Bestanden uploaden (upload files). To change your print settings, select Instellingen (settings) on this website. Then select Print. Your file is now ready to collect at the printer.
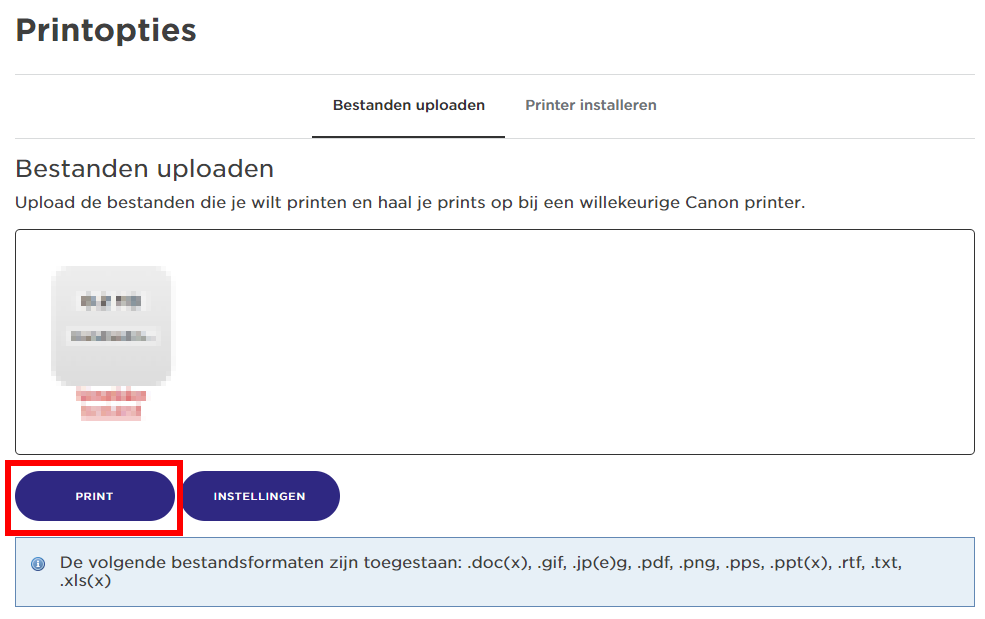
Upload your file and select Print. - Step 3
Request your PIN
Select your name at the top right and choose Pincode. Then select Nieuwe pincode opvragen (request a new PIN). Your code appears on screen and is also sent by email. You do not need to memorise the code: it is valid for 24 hours. After that, request a new code. Please note: a new code can take up to 15 minutes to become active.
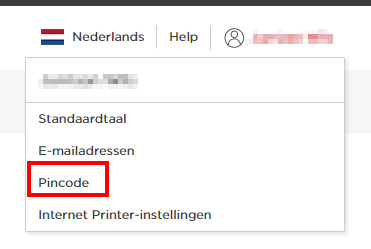
Select your name, then Pincode. 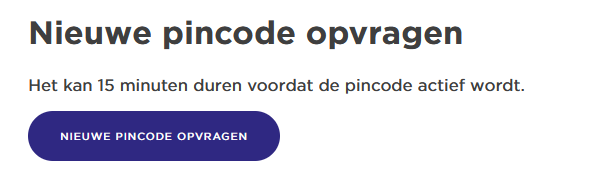
Request your code and allow time for it to become active. - Step 4
Sign in on the printer with your code
Go to a Canon printer at school and choose to sign in with a PIN. Enter the code you just requested, then tap Log in.
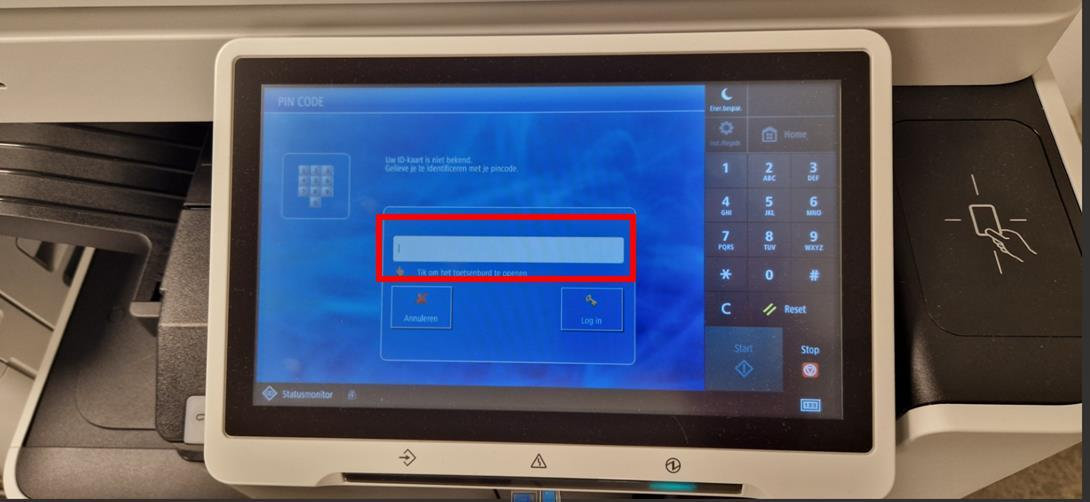
Enter your PIN and tap Log in. - Step 5
Open Secure Print
On the printer screen, tap Secure Print. This is where you will find the files you submitted.
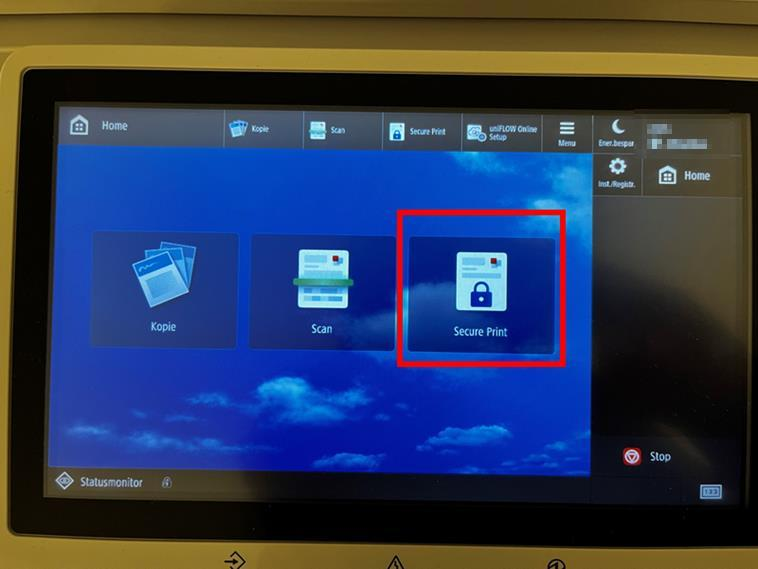
Tap Secure Print to find your print job. - Step 6
Select your file and print
Tap your print job in the list, then tap Druk af (print). Wait for the printer to finish and collect your printout. Sign out on the printer afterwards.
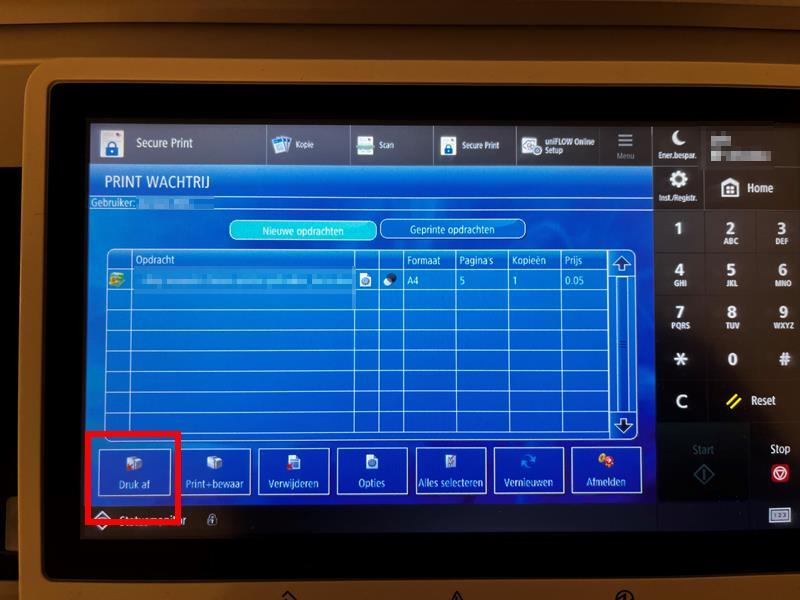
Select your job and tap Druk af at the bottom left.
Done! Your printout is ready.